Driving is both convenient and enjoyable, but it’s also a responsibility. It falls onto each driver to make sure that their vehicle is functioning properly to reduce the risk of unhappy and potentially catastrophic incidents. Hence, for both the beginner and seasoned driver, it is worthy to know how to check brake pads for wear and other simple maintenance procedures.
Drivers who take it onto themselves to do some routine maintenance can avoid pricey premiums and unfair service prices, so it makes sense that one would like to obtain such skills. Brake pads are arguably one of the most important elements of the car since having reliable brakes can literally save a driver’s time, money and even lives.
What are the Required Tools?
It’s easy to learn how to check brake pads. While they’re definitely an important part of the vehicle, they’re built around a simple principle; thus, being accessible to everyone. That being said, some tools are required for checking and changing the brake pads, and they are the following:
- A mallet or a big hammer
- A floor jack
- Two jack stands
- The car’s manual
- A socket wrench
- Torque wrench (optional)
If the brake pads must be swapped, then the driver will also need:
- A threadlocker
- Cleaning products
- New brake pads
How to Check Brake Pads
When it comes to car safety, the driver should really steer away from any sort of shortcuts. These are important steps towards guaranteeing that the car is fit for traffic, so every step must be done properly.
The initial step would be to loosen the nuts that keep the wheel in place. This will prevent the wheel from spinning when lifted. A socket wrench is more than enough to do so, but a torque wrench might be useful if the nuts are too tight.
The second step is to check the user’s manual for some helpful information regarding the car’s lifting points. Check the manual to see where it’s safe to install the floor jack and jack stands. After this is clear, install the floor jack and elevate the vehicle.
The stands should always be placed in the car’s frame. If they’re placed on the car floor, then they will pierce the vehicle and cause some serious damage. Keep an eye out for any embossed piece of metal and raise the jack stands to the desired height.
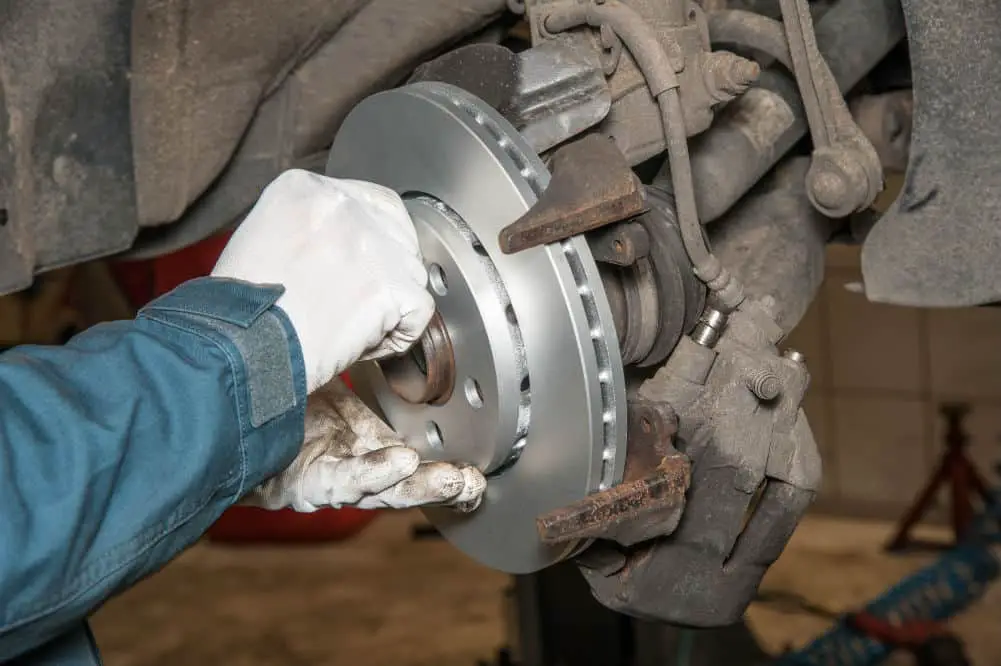
Now that the car is elevated, the nuts can be threaded off completely. Remove the wheel and take a look at the exposed rotor and caliper. Calipers usually have an orifice through which the driver can check the brake pads for wear. Spin the rotor and inspect the level of wear, ensuring that the surface of the brake pad is flat.
Quick Tip: An easy way to get more access to the bolts is to steer the wheels in a different direction. Just open the vehicle and change the angle.
● Signs of Worn Out Brake Pads
The brake pad friction material should be thicker than three millimeters. If the thickness is at or below three millimeters, then it’s imperative for the driver to swap them out. Another thing to keep in mind is to check and measure all of the brake pads. If they wore unevenly, then they must also be replaced with newer products.
Some other simple ways indicate when a brake pad must be replaced. Such include reduced performance, squealing noise when braking, and pulling left or right when braking.
● Replacing Brake Pads
If the brake pads are worn out, then they must be replaced immediately. If the driver wants to save some money, then it’s a good idea to take this matter into his or her hands. With that said, after exposing the braking system, the next step would be to remove the caliper.
Caliper removal is done using a socket wrench. Some models have two bolts, while others have one. After loosening and taking out the bolt or bolts, place the caliper safely, without damaging the brake line. A bungee cord or a wire can be used to tie the caliper safely.
The next step would be to remove the caliper bracket. The bracket is the part which literally keeps the pads in place. These pieces are also kept in place using bolts, so take them apart using the same method. Do note that when removing caliper bolts, make sure to check where the threadlock has been applied and re-apply product before threading back in.
How to Clean and Install a New Rotor
Now that everything has been removed, the only piece that’s left is the rotor. The rotor doesn’t have to be swapped if it’s still in good condition. If the surface is either rusted or uneven, then it might be a good idea to invest in new rotors. To remove the rotor, just pull it off from the hub. If the rotor is stuck in place, then use a large hammer or mallet (either metal or wooden) to knock it off.
Once the rotor is off, use sandpaper or a metallic brush to even the surface and remove most of the dust. Use a brake cleaner to give it a rinse. Do the same with the caliper bracket. The new rotor should be cleaned from any oil to prevent it from rusting in storage. Some brake cleaners will do the trick. After that, install the new rotor.
Install the caliper brick and apply grease or lubricant to the brake system. Brake grease should be applied to the brake caliper bracket, where it makes contact with the extremities of the brake pads. It’s very important not to get lubricant on the inside of the pads and rotor. Grease can also be applied to the back of the pads to prevent squeaking noises.
Put the brake pads in and install the caliper clamp. For maximum safety, the driver can also optionally clean and lubricate the caliper guide pins, which are sliding bolts set at the extremities of the caliper. Apply threadlocker to the bolts and tighten everything in place. Lastly, put the wheel in place and tighten the nuts in a star pattern to ensure even pressure.
Final Thoughts
Overall, it’s an easy process to check and replace the brake pads. All of the hardware required is widely available at profile hardware stores. After everything has been assembled, make sure to take the car out for a quick spin to ensure that everything works properly.